
My Love
This tag was created with the awesome kit "It's A Goth Thing" and can be purchased here:
http://mysteikllesinfulkreationz.ecrater.com/index.php
The tube I used is also purchaseable at the same site above and created by the wonderful artist Andrew Sussmann @ http://www.imageartistry.com/ . Please do not use his work without a valid license.
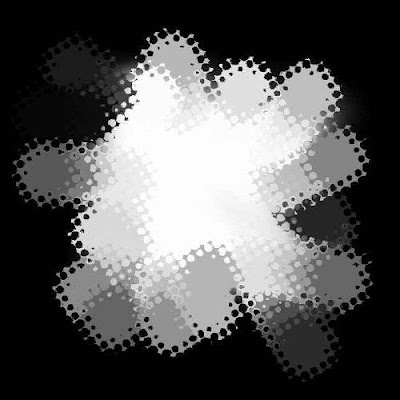
Here is the mask I used. Thank you Becky for making it!! Just right click and save as.
ON TO THE TUT.......
600X600 white background. Layer>New Raster Layer> Select all.
Copy and paste (C/P) and paper of choice from the kit by pasting INTO SELECTION. Select none. Open your Becky Mask 038 provided and Layers>New mask Layer from image> apply.
Merge group. Now resize the mask layer by 110% and sharpen. Move it to the center of the canvas.
Open and paste your frame of choice. I used the barbed wire and rose frame. Resize by 75% 2 times. Sharpen. Hide your mask layer and with your magic wand, select inside the opening of your frame. Select>Modify>expand>1 Keep selected.
New Raster Layer. Flood fill this with black or any other color of choice. Select invert, delete and select none. Move this below your frame layer but do not merge it. If you are using the same frame, I brightened and cleaned it up a bit so if you so choose, here is what I did.... Select the frame layer. Go to ADJ>Brightness/Contrast and use these settings..... Bright 65 Contrast 45 and click ok. D/S your frame 2/2/45/5.00 twice.
Select your black background below the frame and float/defloat it; CTRL A and CTRL F then defloat under selections. Select a contrasting color paper from the kit and paste onto canvas. Select the new paper layer in the pallets if it isn't already. Select>Invert>Delete. Move this below your black layer. Select your black layer in the pallets again.
Choose your Text typing tool and select a font of your choice. I used Mesquite Std. Size 110 if you are using the same font or adjust to the one you are using. Bold type selection. Type out any word or words. I did MY LOVE. Layers>Convert to raster layer. Position the type where you want it to be. Float and defloat the type. (ctrl A, ctrl F, defloat). You should now have the words you typed outlined with marching "ants". Go to Effects>3D Effects>Cutout. Play with the color and the shadowing in the cutout menu until you are satisfied with the sample and hit ok. Now your letters are gone but the "ants" are still there. Select your black background in the layers. hit your delete key twice. Ah ha! Now you can see the color you made underneath! Select None.
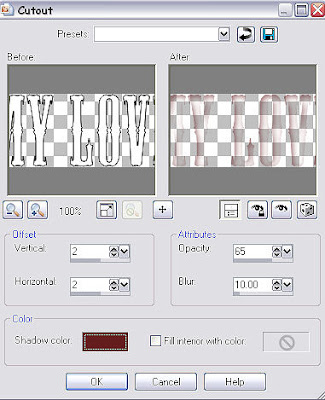
Choose another font ( I used Bickham Script Pro Bold) at 48 pixels and the color D0021E. Type out your normal words you want underneath your cut out ones. Convert to raster layer and position.
Open the Suffering Heart from the kit. C/P and resize by 40% then by 60%, sharpen. Position it to make it look like it is hanging off one of your typed letters.
Hide your white background layer, mask layer, colored sheet. Merge Visible. Unhide all. U should now have something that looks like this......
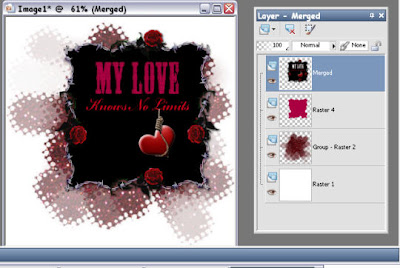
Open your choice of tube. Resize to fit your tag. Sharpen. Place to your liking and D/S of choice.
DO THIS STEP ONLY IF YOU ARE NOT ANIMATING YOUR TAG! ANIMATION WILL BE BELOW.
Select your colored background and float, defloat it. Adj>Add noise>Uniform at 65% and Monochrome. Merge all layers, resize to your liking and sharpen.
Add your copywrites and name. You are done!
ANIMATION: This is a step by step on the animation for those new at it. If you are a pro, then you already know what to do so have fun with it!
Open Animation shop.
In PSP, Select your colored sheet layer. Ctrl A and Ctrl F> selections>defloat. Adj>Add noise>uniform 65% Monochrome ok. All of your layers should be open and visible! Select none. Go to Edit> Copy Merged.
Go to Animation shop and Paste as a new animation.
Go back to PSP and hit your Ctrl Z key twice. This makes the marching ants come back and removes the previous noise you did. Now, reapply the noise but DO NOT CHANGE THE SETTINGS! Select none. Edit>copy MERGED.
Back to animation shop and paste AFTER CURRENT FRAME.
Go back to PSP and remove and redo the noise one more time. Edit>copy Merged.
Back to animation shop and once again paste after current frame. You now have 3 frames of your tag. If you want to check your animation, just click on the little Movie Icon at the top right corner bar.
Save as a gif and you are done.
Hope you enjoyed this tut.
Hugs, Lana


No comments:
Post a Comment