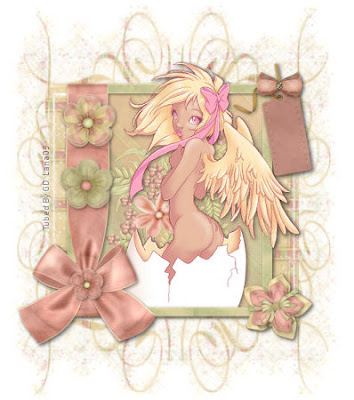
This wonderful kit is called Country Rose and can be purchased from Dee's Deelights @ http://dees-deelights.com/store
My Additional supplies and mask here: http://www.4shared.com/file/94053601/1325d1f7/Easter_Hatchling_Supplies.html
New Canvas 600 x 600 White Background.
CP Frame 2, Resize by 70%. Sharpen. CP Paper 2, Resize 70%, move below frame layer. CP Paper 7, Resize 70% and move ontop of the last paper but below the frame. Double click on this raster layer and change the opacity to 75%. Ok. Merge both paper layers together.
With your magic Wand tool, select inside the frame opening. Selections, Modify, expand by 3. Selections, invert and click on your paper layer in the palets. Delete. DS (drop Shadow) your frame 2/2/45/7.00
CP a tube of your choice. Resize it to your liking and sharpen. I resized mine 70%. Position at the frame bottom. Sharpen if you resized. Duplicate your tube layer and move one of these below your frame layer but on top of the paper. On your TOP tube layer, lasso and delete any of the eggshell that is over the frame. You don't have to be neat about it so go above the frame edge. Now click on your lower tube layer and do the same to anything BELOW the frame. DS your BOTTOM tube layer 2/2/45/9.00
On your paper layer, add any brushes or accents that you choose. I added Flower 4 from the kit, resized 50% and sharpened. Again, with your lasso tool, delete any of the flower that sticks out below or around the outside of your frame.
Hide your white background and merge visible. Unhide background.
CP another paper of your choice and resize 85%. Open mask 128 By NB in my supplies. Layers, new mask layer from image with the invert box checked. Ok. Merge group. Still on your new mask layer, with your pick tool, resize the mask just slightly larger than your frame. Reposition your frame layer if needed.
Open Rose Flowers 1,2,3. Resize each by 40% and then by 60% and sharpen. CP them onto your working canvas. Resize the rose colored flower another 60% and position on the bow, sharpen again. Position the remaining 2 flowers on the ribbon. Merge these down to your frame layer.
Open Rose Flowers 5 and 7. CP both flowers onto your canvas with the lighter colored one being underneath. Resize the top flower 40% then 50% and sharpen. Resize the lower flower 40% then 60% and sharpen. DS each flower separately 2/2/45/7.00 and Merge these 2 together. Position in the bottom corner of your frame. Merge down to the frame layer.
Open your bows from the kit. With the lasso tool, select the one you want by drawing a line around it then Edit, copy. Paste it onto your working canvas and resize by 20%. Sharpen and DS same as before. Move to the top corner of your frame. DO NOT MERGE YET!
CP the tag in my supplies and resize to your liking (90%). Image>Free Rotate> Left 10. Position it under the bow and DS. Sharpen if needed. Now merge your bow down to the tag. Merge down to your frame layer. DS your whole tag layer once again with the same settings. (2/2/45/7.00)
Lastly, select your mask layer. Effects>Xenofex 2 Constellation> with the standard settings and keep original image box selected. OK. Hide your white background and Merge visible. Unhide it and recenter your tag layer if needed. Merge visible.
Resize 75%, all layers checked. Sharpen if needed. Add your name and copywrites. Save as a jpg.
Hugs, Lana

No comments:
Post a Comment