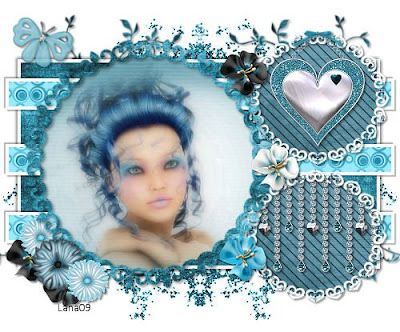
 Beautiful Blue
The kit I used for this tut "Shaken Not Stirred" was created by Lisa at StartFromScrap and can be purchased here: http://startfromscrap.blogspot.com/or here: http://digitaldreamsscraps.com/ Thank you Lisa for such a great kit!!!!
The template I used was from GG and can be downloaded here: http://www.4shared.com/file/98566500/81772e1d/GG_Template_147.html
Just a word of warning with this tut, you will be making everything pretty much even though we use the kit but other than the main template, I will show you how to make your own.
On to the tut.....
New Canvas 500 x 500 White.
Open your GG Template 147, hide the credits layer. Highlight the Frame Fill Layer. Float and Defloat (CTRL AF and selections-defloat). CP (Copy and paste) paper 7 from the kit onto this and Select-Invert-Delete. Select None and CP this onto your working canvas. DO NOT MOVE IT!
Back to the GG Template. You can delete the paper layer you just made on it now. Highlight the Frame Layer. Float and Defloat again. CP Paper 2, selections-invert-delete. Select none and again CP this to your working canvas.
Still on your working canvas, highlight your first circle background layer. Float and defloat. Paste a tube of your choice (resize and sharpen if needed). Invert and Delete. Select none. Select your frame layer and DS (drop shadow) 2/2/45/5.00 Black. Hide your white background and merge visible. Unhide and move your new frame layer slightly to the left.

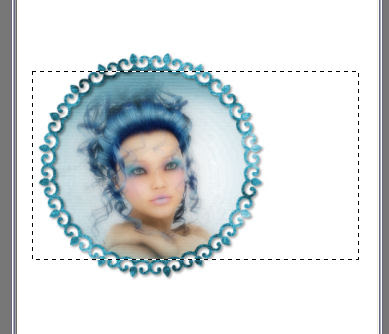
Using your Selection Rectangle tool, draw a rectangle like I have pictured above. Layers-New Raster Layer-Ok. Flood fill this rectangle on the new layer with white. CP Paper 2 again or one of your choice. Selections-modify-contract by 4. Selections-invert-delete. Select none. Now, on your white layer that is below this DS the same then -2/-2/45/5.00 black. Merge your paper rectangle down to the white rectangle. Drag it below your tube/frame layer.
This is what you should have at this point:

Layers-New Raster Layer. Draw out another rectangle again but thinner like I have shown:

Flood fill with white again. Selections-modify-contract by 4. CP paper 22 or one of choice., resize it by 80% and select-invert-delete. Select none. DS your white bar 2/2/30/2.00 and then -2/-2/30/2.00. Merge the thin bar paper to the thin white bar. Layers-duplicate and move down to the middle. Duplicate again and move to the bottom so that you have 3 cross bars. Merge the 3 bars together.
Back to your GG 147 Template. Highlight your Doodle Leave layer and float/defloat. CP paper 24 or choice. Resize by 80% and sharpen. Selections-invert-delete. Select none. CP onto your working canvas and move just above your white background. With your pick/deform tool, stretch out the top and bottom just a hair so you can see it more. DS 2/2/30/2.00 Black.
Back on your template. You can delete any layers that you previously created to make things a little easier. Highlight the Right Fill Layer, float and defloat it. CP paper 9, resize 50% X 2 and mover it to the circle. Selections-invert-delete. CP onto your working canvas as a new layer but DON'T MOVE IT!
Back on your template. Highlight the Right Frame Layer. Float and Defloat. CP paper 12 or choice. Resize it by 35% and sharpen. Move it over to the frame. Invert-delete. Select none and CP onto your working canvas. Move both the little circle and frame layers to the top right of your rectangle. Duplicate both layers and move them down so that now you have 2 smaller framed circles. DS each small frame layer 2/2/45/3.00
CP Element 4 from the kit and Image-resize-20%, sharpen. Move it to the top small circle but under it's frame layer. DS 2/2/45/3.00 black. CP Element 3. Image-resize-40%, sharpen. Move to the lower circle under the frame. Now, select this bottom circle background in the palets and Float/defloat the little circle. Highlight your heart layer Element 3 in the palets. Selections-invert-delete. DS your hearts chain the same.
CP Element 5 Butterfly. Image-resize-15%. Sharpen and mover to liking. I rotated mine 20% to the right by Image-free rotate-20% right. DS same.
Hide everything but the 2 small circle, their frames and hearts. Merge visible. Unhide all. Move your two small circles below your large circle layer in the palets.
CP flowers of your choice. Resize to your liking & sharpen. Position where you want them, DS each of them 2/2/45/5.00. Hide your white background and merge visible. Resize your tag layer if you wish at this time and sharpen. If not, leave it be.
CP Glitter 4 from the kit. Resize 75%, sharpen X 2 and move a little to the left and under your tag layer. Layers-duplicate. Image-Mirror. Merge these two glitter layers together.
With your selection rectangle tool again, Draw around your whole tag so that you are cutting off the excess at the top and bottom. Image-crop to selection.
Add your name and © to the tag layer. Merge visible and save as a jpg.
Hope you liked this tut and making your tag without using any templates other that the one.

No comments:
Post a Comment