Monday, August 10, 2009

New Tags Up!!!

Dee at Dee's Delights has 10 new kits up and matching freebies too. I just adore these kits and had to do something with them so here are the results of the first 2 kits I did.

Also, Dee is offering 10% off the purchase of kits at her site (excluding DeeClub Memberships) with the coupon code NEWS10 until the 14th of Aug. 09 so catch them while they are hot! Grab the kits HERE and grab the freebie add on's HERE .

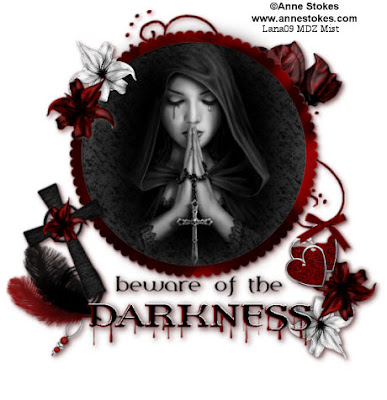
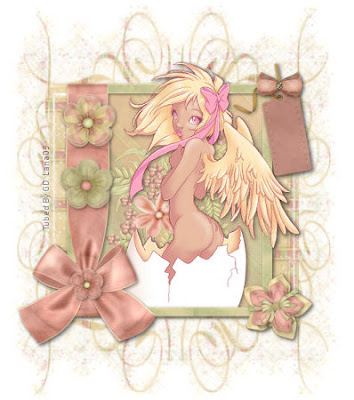
This first one I made with her WINONA kit and it is called "Angel Waiting".

Angel Waiting 2009 By Lana

And here is a preview of the kit......

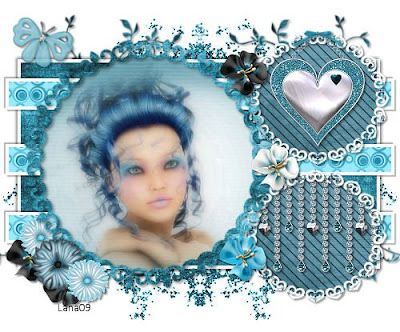
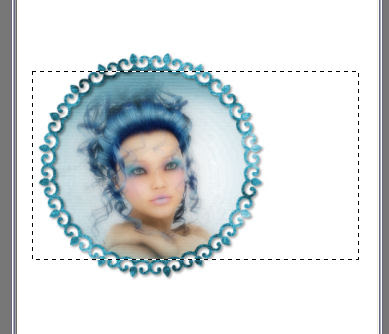
The second tag I made was with the COUNTRY BLUE kit and named "Gypsy Queen".

And here is a preview of the kit.....

Hope you enjoy these and have fun creating.

Hugs, Lana

Tuesday, June 23, 2009

Forever Vintage Tag Tut

This tag was made with the "Vintage Rose" kit, Add On and Freebie by DeesDelights and can be found here: http://dees-deelights.com/store

She is also having an Anniversary Special sale at her store on 6-25-09 on her kits for .21 cents! Can you beat that!!!! Thanks Dee!

On to the tut.....

You will also need the plug in AAA Filters Good Vibrations

New Canvas 600 x 600 white. Open both Wraps 2 and 3. Resize them 500 x 500 all layers checked. C\P onto the new canvas. Line up the wraps on top of each other in any order you like, with the top on a little lower so that you can see both wraps. Merge together. Duplicate>mirror>flip. Adjust them to make a frame. Hide your white background and merge visible.

With your lasso tool set on rectangle, draw a square just slightly bigger than the frame opening. C\P a tube of choice and center it inside the frame. C\P a paper of choice from the kit and Select>invert>Delete on both the paper layer and the tube layer. Select none. Drag the frame layer above your tube and paper layer. DS your tube and frame layer 2/2/65/10.00 Black. Hide white background again and merge visible.

Open up one of the Parasols from the add on kit. Resize to your liking and DS 2/2/65/5.00 black. Merge it down to the frame/tube layer.

Open Pin 01, resize by 25%. C\P onto your canvas. Resize another 50% and sharpen. Free Rotate 55% left and place in the top right corner of your frame. DS the same as before. C\P Brad of choice and resize by 25% then 75% and sharpen x2. Place in the bottom left corner. Move the layer below your frame layer and DS the same.

Open Bow 3 and Button 2. C\P button 2 onto the bow. Move it to the center of the bow. DS the same and merge down. C\P onto your working canvas and resize 20% then 35%, sharpen and DS the same. Move it up to the pin in the top left corner.

Hide your white background agian and merge visible.

Open a NEW CANVAS 600 x 600. Open 2 papers of choice : 1 light, 1 dark. C\P the light colored one onto the new canvas. Then do the same with the dark paper. Resize your dark paper 95%. Duplicate your white paper layer and move one of them up ontop of the dark paper. Resize 85%. DS both the top light layer and the dark layer the same settings as before. Merge these 3 layers. C\P as a new layer onto your tag/frame canvas. Resize by 85% then 80% again. Rotate left 45% and sharpen. Center it below your tag and merge your tag and papers together. you can now close that new paper canvas you just made and the papers. <.p>

Open a heart Doily of choice and resize 50% X 3. Move below your tag layer and slightly to the top. Sharpen.

C\P VRose Freebie 4 string. Resize by 15% and sharpen. Move it slightly to the right and under your frame but above the Doiley layer. Duplicate and mirror. DS the same. Hide your white background again and merge visible.

Duplicate your tag layer. On the BOTTOM tag layer: Effects>AAA Filter>Good Vibrations with standard settings. Don't be afraid to play with the settings if you want. On the TOP tag layer, resize it by 85%, sharpen. Merge visible all layers.

Add your name and Copywrite's. Save as a JPG.

(I added the wording "Forever Vintage" with Brickham Script at 90 and then DS 2/2/100/10.00 WHITE and then 2/2/40/4.00 Black.

Hope you enjoyed this tut. Lana

Just some odds and ends tags I made. Lol.

Sunday, June 14, 2009

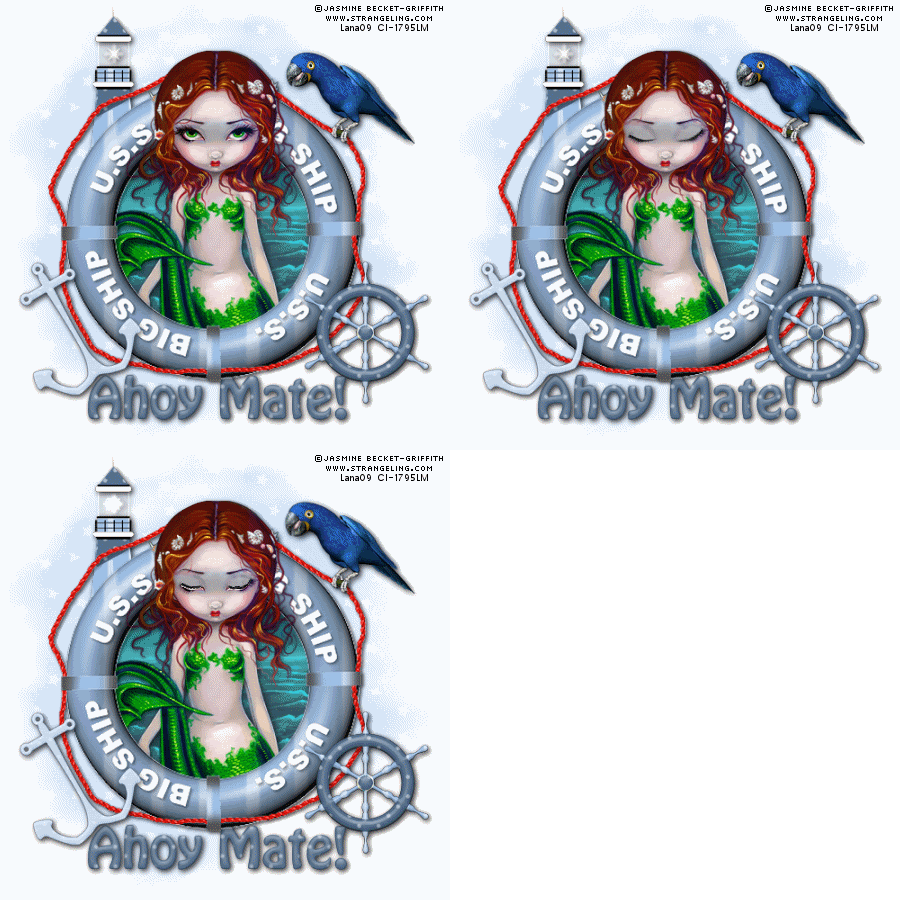
Ahoy Tag Tut

Photobucket

Ahoy!!!! This tut was created mainly to let you learn animation steps for blinking and moving but you do not have to animate it.

This tut was created with Dee's "Denim Blue" kit adn can be located here: http://dees-deelights.com/store there is also a freebie add on to it located on her blog which you can access by her store. Thanks Dee for another great kit!

Open a new canvas 500 x 500 white. Open you tube of choice.

CP a lifesaver of you choice onto the working canvas. Resize it by 115% and sharpen. Select inside the opening with you magic wand and expand by 4. CP a paper of your choice, selection>invert>delete. Move it below your lifesaver frame.

CP a Tube of your choice. Resize if needed. Let it extend past the bottom of your frame just a bit. Duplicate the tube and move it below your frame layer but above the paper circle. Now, on your top tube, erase any part overhanging the frame opening so that it looks like your tube is coming out of the frame. Select your bottom tube layer and DS 2/2/65/9.00. DS your lifesaver frame the same. Now hide your white layer and merge visible. Unhide white background.

CP your parrot. Resize 50% and sharpen. i erased the stick so he could sit on the rope. DS the same. CP the light house and resize 50%. sharpen, DS, and move below your frame layer and to the top left. Hide your white background again and merge visible.

CP your wheel of choice. Resize by 50% and sharpen. DS same. Position to your liking.

CP an anchor of choice and do the same but resize 50% then 75%, free rotate left 30%.

CP a workd art of choice and move to bottom of frame. DS the same and them merge all but the white background again.

CP a paper of choice. Resize by 75% and Apply a mask (I used Becky 023) and merge group. Duplicate this mask layer and merge them together. Now merge the mask layer down to the white background.

Resize all layers 450 x 450 pixels and sharpen if needed. Add your copywrite and name and merge down to the mask/background layer. If you are not animating, save as a jpg. You are done.

ANIMATION

Open up Animation Shop. U should have 2 layers on your working canvas; your mask/white background layer and your tube/frame layer. Duplicate your tag layer 2 times to give you 3 tag layers total and one background.

Zoom into your tag 250%. We are going to make the eyelids. Select your top tag layer in the pallets. With your freehand Lasso tool, follow the shape of the eye one at a time making a circle around them. Make it slightly bigger than the eye opening at the top. With your clone tool (a little button in your tool bar with 2 paint brushes on it), Set your copy area by holding down your sift key and your left mouse key and dragging it over to one of the eyes. Try to select an area where the color would most likely be the eyelid. Now color in your circled areas but only half way down so that the eyelid will look half closed. You may have to reset your color area several times depending on the tube you use. Once that is done on both eyes, take your brush tool with black color, set to 1 on the circle diameter and make some eyelashes on your half lids. Deselect. Hide this top tag layer now.

On your second Duplicate layer, repeat the process but color in the whole eyelid area. Don't forget to add your eyelashes on them. Also, don't be afraid to use your soften tool to blend in the edges of the top of the lids to the brows after you deselect. Got it so far? Pretty easy huh?

Now off to the rest of the animation..... bring your zoom size back down to 100% now. Choose one of your duplicate tag layers. Doesn't matter which one but the top one is easiest. Make sure it is unhidden...lol.

Select your WARP brush tool with size 50 or there about. Hardness 0, and mode is the side arrow selection. Click on the Parrot's head and move it up ever so slightly. Doesn't need to be much. Choose your lighten/darken tool size 20 and click several times on the lighthouse light.

Hide your top 2 duplicate layers. you should have your background layer and original tag layer visible. Edit>copy MERGED. Paste it is Animation shop as a new animation.

In PSP: Hide your original tag layer and unhide the first duplicate layer. Again, Copy Merged. Paste in AS after current frame.

In PSP: Hide your last use duplicate tag layer and unhide your second duplicate tag layer. Copy Merged and paste in AS after current frame.

In Animation Shop: Click on your first tag screen (should be your original tag you made) and change the frame properties to 100. Click on your half lid closed layer and change the frame properties to 15. Click on your closed lid layer and change the properties to 20.

Check your animation with the little movie icon in the tools bar. If satisfied, save as a gif and you are done.

Hugs, Lana

Tuesday, June 9, 2009

3 Tags I have made with Dee's Kits

Here are 3 tags I made with Dee's great kits at http://dees-deelights.com/store Made with her "Pickleberry" Kit Made with her "Denim Sin" Kit Made with Dee's "Mellow Mint" Kit

Please tell her that I sent you if you buy these wonderful kits!

Lana

Twilight Tag Tut

Photobucket My Version of Twilight

This tags was made with the gothy kit of Dee's at http://dees-deelights.com/store called "The Master Returns" and a freebie add on at her blog! Please tell her I sent you when you go to purchase.

Create a new canvas 500 X 500 white background. Copy and paste the frame from the kit and resize to 75% and sharpen. Magic wand inside the frame and modify>expand by 2.

CP the Journaling paper from the free add on kit. Move to where you want it, invert and delete. Select none and move under the frame. Drop shadow the frame and background 2/2/55/6.00

CP the gate from the kit and move below your frame layers and up a bit so you can see it out the top. DS the same.

CP the Sun Dial, resize by 50% then by 75%. sharpen and place at bottom left. DS same.

CP the Lamp, resize 50% x 4 and sharpen. move to the top of the gate and DS same.

CP the Candlabra and resize 25% then 50% sharpen and move to bottom right of frame. DS the same.

CP the Time Piece, resize 75%. Image>free rotate>left 30% and sharpen. DS the same and place below candles in bottom right.

Select your journal paper layer and float, defloat. CP a tube of choice and resize/sharpen if needed. Place in frame, invert and hit delete. Hide your white background and merge all visible layers. Unhide white background.

CP a paper of choice and move below frame layer. I used paper 02. Apply a mask of your choice; I used Becky Mask 023. Merge group. FM Tile Tools> Blend Emboss> standard settings. Ok./p>

CP the metal hinge. Move it below your frame layer and to the bottom but above your maske layer. DS same and merge with frame layer.

Open paper 5 and paper 3. Set each of them as your pallet colors by clicking on the material color blocks and choosing them in the patterns tab. Hide your bottom darker pattern color.

With your preset shape tool, eclipse shape and width 3, draw an oval above the top of the gate. KEEP IT AS A VECTOR LAYER!!!! Create a new raster layer on top of it. Unhide your bottom materials pattern dark color now. With your text tool and a font of your choice (I used Black Chancery), size 48 or there abouts, and stroke width 1, click on the top left part of your vector circle. Type out your word. It will curve around your oval that you made. If not, try it again. your should see an A+ when you are over the oval line. Once your work is written, convert your text to raster layer. Now you can delete the blank layer and your oval vector layer. Move your word into position and DS same.

Apply your name and copywrites. Crop it if needed. Save as a jpg if you are not animating. You are done.

Animation: Merge all layers. Open up animation shop.

In PSP, add a new raster layer so that you have 2 layers; your blank one and your tag layer. On your tag layer with your freehand lasso tool, make little teardrops over each candle. Don't worry about being neat as we are going to be changing them.

Eyecandy4000 Fire with the following settings:


Direction: 90
Column Length: 739.13
Flame Width: 13.86
Side Taper: 33.49
Movement: 33
Check Denser Flames
Check Start from far side
Random Seed: 567
ok. Select none and copy MERGED.

In AS: Paste as a new animation.

Back in PSP, undo your flame until you just have the outlines again. (CTRL Z) Apply the fire again but hit the Random Seed twice. Select None. If you want to make the lantern glow, click on your lighten/darken tool in your tool bar. Size 30 and click a few times on the lantern. Copy Merged and paste in AS after current frame.

Back in psp: CTL Z to get rid of the lantern glow and again until you see your little tear drop outlines again. Repeat the fire, hitting the random seed again. Copy Merged and paste in AS after frames.

Save as a gif and you are done. Hope you liked this tut.


Lana

Saturday, May 23, 2009

Fairy Friends Tag

This tag was created with the wonderful kit of Helga's.... Live Laugh Love kit found at: http://www.helgasclassiecreationz.blogspot.com/

Tags I have done recently

Thursday, April 16, 2009

Play Me Again Tag Tut

This tag was created with a wonderful kit by Seashell at: http://seachellscrapz.blogspot.com called Rock Me. Thanks Seashell!

I used the wonderful art of Elias Chatzoudis and can be purchased at: http://mypsptubes.com

Filters i used for this tag are EyeCandy5 Impact Glass and Graphics Plus Peacock. Also Xenofex2 Stain.

New Canvas 600 x 600 white.
CP Element 11 and resize 70% sharpen. I lasso'd the crown and deleted it.
CP Element 17 and resize 70% sharpen. Move it down below your Element 11 layer. Image-Flip. DS 2/2/45/8.00 Black.
CP Element 14. Resize 50%, sharpen. Image-free rotate-20% to the right. Move to the bottom of your belts and DS same x 2.

On your white background layer, selections- select all.
CP Paper 11 or your choice. Resize it to 600 x 600 pixels. Selections-modify-contract by 10. Hit delete. DS the same then -2/-2/45/8.00 and merge it down to the wohite background.

With your magic wand, click inside the big heart. You may have to do this a few times to cover the whole area. Layer-New Raster Layer ok.
Effects-3d effects-cutout with these settings:
Vertical=2
Horizontal=2
Opacity=100
Blur=8 and color=FFC0C0 ok. Keep it selected!

Click on your skull heart layer. EC5 Impact glass with these settings:
Color=FFC0C0 and under the BASIC TAB:
Bevel Width=35.50
Refraction=11
Inner Shadow Opacity=35
Shadow Glow=32
Under the LIGHTING TAB:
Brightness=16
Highlight=75 White color.

Ok and then select none. Merge this layer and your cutout layer down to the original heart/doodle layer. Resize the doodle layer 85% now, sharpen and move up alittle.

Hide your white/frame background and merge visible. Unhide and add a music symbol or other where the crown was if you like. Merge it down to this layer.

CP a tube of your choice. Resize and sharpen if needed. DS 2/2/75/10.00

At this point add your name and © to the tag and merge it to the tag layer.

Ok, here is where it gets a little bit tricky but I have faith that you can pull it off with stunning results! Lol.

With your magic wand, select inside some of the wing feathers. Make sure to select a good amount for a nice effect! Once you have selected all you want, Effects-Xenofex2-Stain with the color 8E2E30. All other numbers standard. Ok. Keeping selected, duplicate the tag layer 1 time so you have 2 tag layers now. KEEP SELECTED! If you are familiar with layers, you can do more than 2. Hide the top tag layer.

Effects-Graphics Plus- Peacock. All settings are standard EXCEPT move the green toggle to 0, Blue to 37. ok. Now hide your bottom tag layer and unhide the top tag layer. Apply the Peacock effect again but change the Variation up a few numbers. ok. Select none.

On to the animation....

In PSP... Edit-Copy Merged. In Animation Shop... Edit-paste as new animation. In PSP... Hide the current tag layer showing and unhide the second one. Edit-Copy Merged. In Animation Shop... Edit-Paste AFTER current layer.

Check your animation by clicking on the little movie icon in the task bar. If you like the animation, save as a gif and you are done.

Hope you had fun with this one. Hugs, Lana

Tuesday, April 14, 2009

Beautiful Blue Tag Tut

Beautiful Blue

The kit I used for this tut "Shaken Not Stirred" was created by Lisa at StartFromScrap and can be purchased here: http://startfromscrap.blogspot.com/or here: http://digitaldreamsscraps.com/ Thank you Lisa for such a great kit!!!!

The template I used was from GG and can be downloaded here: http://www.4shared.com/file/98566500/81772e1d/GG_Template_147.html

Just a word of warning with this tut, you will be making everything pretty much even though we use the kit but other than the main template, I will show you how to make your own.

On to the tut.....

New Canvas 500 x 500 White.

Open your GG Template 147, hide the credits layer. Highlight the Frame Fill Layer. Float and Defloat (CTRL AF and selections-defloat). CP (Copy and paste) paper 7 from the kit onto this and Select-Invert-Delete. Select None and CP this onto your working canvas. DO NOT MOVE IT!

Back to the GG Template. You can delete the paper layer you just made on it now. Highlight the Frame Layer. Float and Defloat again. CP Paper 2, selections-invert-delete. Select none and again CP this to your working canvas.

Still on your working canvas, highlight your first circle background layer. Float and defloat. Paste a tube of your choice (resize and sharpen if needed). Invert and Delete. Select none. Select your frame layer and DS (drop shadow) 2/2/45/5.00 Black. Hide your white background and merge visible. Unhide and move your new frame layer slightly to the left.

Using your Selection Rectangle tool, draw a rectangle like I have pictured above. Layers-New Raster Layer-Ok. Flood fill this rectangle on the new layer with white. CP Paper 2 again or one of your choice. Selections-modify-contract by 4. Selections-invert-delete. Select none. Now, on your white layer that is below this DS the same then -2/-2/45/5.00 black. Merge your paper rectangle down to the white rectangle. Drag it below your tube/frame layer.

This is what you should have at this point:

Layers-New Raster Layer. Draw out another rectangle again but thinner like I have shown:

Flood fill with white again. Selections-modify-contract by 4. CP paper 22 or one of choice., resize it by 80% and select-invert-delete. Select none. DS your white bar 2/2/30/2.00 and then -2/-2/30/2.00. Merge the thin bar paper to the thin white bar. Layers-duplicate and move down to the middle. Duplicate again and move to the bottom so that you have 3 cross bars. Merge the 3 bars together.

Back to your GG 147 Template. Highlight your Doodle Leave layer and float/defloat. CP paper 24 or choice. Resize by 80% and sharpen. Selections-invert-delete. Select none. CP onto your working canvas and move just above your white background. With your pick/deform tool, stretch out the top and bottom just a hair so you can see it more. DS 2/2/30/2.00 Black.

Back on your template. You can delete any layers that you previously created to make things a little easier. Highlight the Right Fill Layer, float and defloat it. CP paper 9, resize 50% X 2 and mover it to the circle. Selections-invert-delete. CP onto your working canvas as a new layer but DON'T MOVE IT!

Back on your template. Highlight the Right Frame Layer. Float and Defloat. CP paper 12 or choice. Resize it by 35% and sharpen. Move it over to the frame. Invert-delete. Select none and CP onto your working canvas. Move both the little circle and frame layers to the top right of your rectangle. Duplicate both layers and move them down so that now you have 2 smaller framed circles. DS each small frame layer 2/2/45/3.00

CP Element 4 from the kit and Image-resize-20%, sharpen. Move it to the top small circle but under it's frame layer. DS 2/2/45/3.00 black. CP Element 3. Image-resize-40%, sharpen. Move to the lower circle under the frame. Now, select this bottom circle background in the palets and Float/defloat the little circle. Highlight your heart layer Element 3 in the palets. Selections-invert-delete. DS your hearts chain the same.

CP Element 5 Butterfly. Image-resize-15%. Sharpen and mover to liking. I rotated mine 20% to the right by Image-free rotate-20% right. DS same.

Hide everything but the 2 small circle, their frames and hearts. Merge visible. Unhide all. Move your two small circles below your large circle layer in the palets.

CP flowers of your choice. Resize to your liking & sharpen. Position where you want them, DS each of them 2/2/45/5.00. Hide your white background and merge visible. Resize your tag layer if you wish at this time and sharpen. If not, leave it be.

CP Glitter 4 from the kit. Resize 75%, sharpen X 2 and move a little to the left and under your tag layer. Layers-duplicate. Image-Mirror. Merge these two glitter layers together.

With your selection rectangle tool again, Draw around your whole tag so that you are cutting off the excess at the top and bottom. Image-crop to selection.

Add your name and © to the tag layer. Merge visible and save as a jpg.

Hope you liked this tut and making your tag without using any templates other that the one.

Wednesday, April 8, 2009

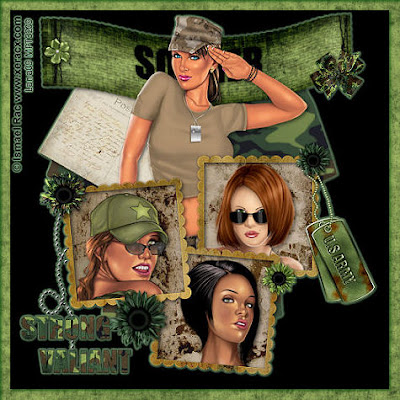
In The Army Now (PTU)

This tut was made with the irresistible kit of Seashell's called "In The Army Now" and can be purchased here: http://seachellscrapz.blogspot.com

Create a new canvas 500 x 500 Black Background. Open Element 61 frames. Image-Rotate Right. CP onto your canvas and resize 50%. Move to the lower part of your canvas. With your magic wand, select inside each frame. Selections-Modify-expand by 4.

CP paper 10 onto canvas and resize by 50%. Move over to frame. Invert-Delete. Sharpen and move below the frame. Hide this layer in the palets now.

Magic wand one of the frame openings, Selections-modify-expand by 4. CP a Tube of choice. Select-invert- delete. Select none and mover below frame layer. Repeat steps for the other 2 frames. DS each tube 2/2/60/7.00 and well as the frame itself. Hide your black background and merge visible.

CP one of the t-shirts. Move behind your frame layer and resize 75%. Sharpen. CP your main tube and move behind the frame. Resize and sharpen if needed. CP Element 64 Post Card. Resize 50% then 75%. Image-Free Rotate- Right 30% and move it up to top left corner and behind your main tube. Sharpen and DS same. CP Flowers of your choice. Resize 40% twice and sharpen. Move to your liking.

CP Element 31 or your choice of banner. Resize 75% and sharpen. Move it to the top and below your main tube. CP Element 24 Bow. Resize 20%, sharpen and put on bottom right corner of the banner. DS same. CP Element 68 Chain. Resize 20% then 50% or to your liking. Image-Flip. Image-Rotate Left 40%. Hang it under one of your frame flowers. DS same. CP another flower of your choice and resize to liking. Put it on the opposite side of the banner, sharpen and DS same. CP words of choice. Resize to your liking, sharpen, and hang off the chain. CP a dog tag of choice. Resize to liking, sharpen and hang off of the banner bow.

Hide your black background and merge visible. Unhide and select your tag layer. Effects-EyeCandy 4000 Gradient Glow with these settings: Glow Width = 3.00 Soft Corner = 25 Opacity = 100 Draw outside only = checked Under the color tab = color is #93c791 all others settings standard. Ok.

Merge visible. Image-Resize all layers checked 450 x 450 pixels.

Image-Canvas Size-475 x 475 with Center Square checked. Top = 12 Bottom = 13 Left = 12 Right = 13.

With your magic Wand, click on the new border around your tag. CP paper 3 as a new layer. Selections-Invert-Delete. KEEP SELECTED!!!!

Invert again. Layers-New Raster Layer-ok. Effects-3d effects-cut out with these settings: Verticle=2 Horizontal=2 Opacity=65 Blur=4 and the shadow color and darker green you want. Click on the color box to change it. Fill with color NOT CHECKED. DS the same on this cut out layer and merge visible.

Add your name and © and save as a jpg.

Hugs, Lana

Saturday, April 4, 2009

Forever Hopeful Tag Tut (PTU)

Forever Hopeful

This tut was made with the fantastic creation of Helga at ClassieCreationz and called Joy Of Hope kit. It can be found here: www.helgasclassiecreationz.blogspot.com

I am using the art of Ismael Rac and can be purchased at MPT. Please do not use without a valid license.

Here is the mask I am using. Just right click and save to your computer somewhere...lol.

Create a new canvas 500 x 500 white.

CP frame 1 and resize 50% then sharpen. With your selection rectangle tool, draw around the outside of the frame opening. CP another paper of choice, resize by 50% and sharpen. Place it in the center of your outlined square, invert and delete. KEEP SELECTED!

CP a tube of choice. Resize, sharpen and center in the box. Hit delete. DS 2/2/45/5.00 and then on your layers pallet double click on this layer. Change the opacity to 75%. Deselect.

CP the main tube of your choice. Resize if needed and sharpen. Place it to your liking. DS 2/2/75/8.00

CP Bling Flower 1. Resize 50%. Image>Free Rotate>Right>60%. Sharpen and then move to the left of the frame. Layers>Duplicate. Layers>Mirror and position if needed. Merge these 2 blings together and move them below the frame and paper layer. Duplicate again and merge together. DS 2/2/45/5.00

Open Flower 1 & 2. Resize to your liking and sharpen. Open Sunflowers 1 & and 2. repeat. CP all of them onto the canvas and position to your liking. Drag them below your main tube layer. DS the same. Open Doodle 1, resize 40% and sharpen. CP it onto your canvas. Image>Free Rotate>Left 40%. Sharpen again. Move it under your flowers you just did. DS the same. I duplicated this and mirrored it then moved it under the lower flowers. Merge all your flowers and doodle together.

Open a Sunflower. CP a Wax Seal of your choice onto the middle of the Sunflower. Merge them together and then CP onto your canvas. move to the top right of the frame. Resize if needed and sharpen. DS the same TWICE.

Open a bead string of choice. Image>Rotate Right. CP as a new layer onto your working canvas. Resize 15% and sharpen. Move to the top corner under your Sunflower. DS same TWICE.

CP Butterfly 1. Image>Resize 15%, sharpen. Move to the end of the bead string and DS same twice. CP a bow of your choice. Resize 15%, sharpen, move to the middle of the bead strand and DS same TWICE. Add any other elements you wish to at this time.

Select your frame layer and DS 2/2/60/10.00 Hide your white background, blings, paper layer and inside tube. Merge Visible. Unhide. Now Merge your Paper, blings, & inner tube together. You should only have 3 layers now; white background, paper and inner tube layer, top frame tag layer.

Select your white background layer and CP another paper of choice from the kit. Open your mask. Layers>New mask Layer>From Image and select the mask. Apply it. Merge group and then merge down to the white bkgrd. If you are not animating you can merge all layers, add your name and © then save as a jpg. If you are animating, add your name and © now then merge to the top tag layer.

ANIMATION

Open Animation Shop. Hide your white bkgrd/mask layer and the top tag layer. Copy MERGED the middle layer with the paper and inner tube on it. Paste as a new layer in AS as a new animation. In your tool bar: Effects>insert image effect. On your image effects screen the "Start with" box should have Animation Frame Checked. Direction NOT checked. Effect = Underwater. Click on the "Customize" button and select Apply Sunlight Dappling. Sunlight intensity = 10, Water Depth = 10. Hit your "remove wave" button once. Ok.

Now you should be back on the main image effect screen. Move the slider bars down below to read... Effects length = 0.9 sec and Frames per sec = 6 FPS Ok. You should see a total of 6 frames. Go to the very first frame and click on it then hit delete. Now you have animated frames.

Back in PSP.... Hide your middle layer and unhide the top tag layer. Copy Merged. Back in AS, paste as a NEW ANIMATION. Hit the duplicate toggle button in the tool bar 3 times so that you now have 5 frames of your tag layer. CRTL A C.

Click on your middle layer frames that you just got through making. CTRL A E. and center the tag onto the animation. Click your mouse.

Back in PSP.... Hide your top tag layer and unhide your bottom white/mask layer. Copy MERGED. In AS, paste as a NEW ANIMATION. Duplicate this again with the toggle button 3 times to make 5 layers.

Now, click on your tag animation you just made and CTRL A C. Click on your white mask animation layers and CTRL A E. Center the tag onto the background and click your mouse.

Check your animation with the little movie icon in the task bar. Save as a GIF.

Hugs, Lana

Tuesday, March 31, 2009

A Faerie's Tear Tag Tut (PTU)

A Faerie's Tear

I created this tag with the wonderful kit called Firefly Garden of Helga's and can be purchased at: www.helgasclassiecreationz.blogspot.com or at the store under classiecreationz here: http://www.digi-shoppe.com/index.php?main_page=index&cPath=49_50

My supplies that I used additional including the rain animation can be downloaded here: http://www.4shared.com/file/96061989/a44d3782/Faery_Tears_Tut_Supplies.html

Alrighty then, on to the tut......

Open a new canvas 500 x 500 white. CP the Celtic Template I made onto the canvas. Float and Defloat ( CTRL AF then defloat). CP Paper 11. Resize 75% and sharpen. Select>Invert>delete. Select none. Now you can delete the template layer that I made. DS 2/2/45/3.00

CP the patterned flower 1 from the kit. Resize by 25% and sharpen. Center it as best you can on the canvas. Effects>Muria Meister Copies> with these settings: Preset Menu= encircle, Shift mode = Circle. All other settings, leave as they are. ok. Resize by 95%, sharpen and center on your template circle. DS 2/2/45/5.00

Hide your template layer now and magic want the center of your flower circle. Selections>Modify>Expand by 8. Paste a scenery of choice onto the canvas and center on your circle. Selections>Invert>Delete. Seelct none and move it under your flower circle. Unhide your template layer.

CP Your main tube onto the canvas, resize to your liking, sharpen and position. DS 2/2/75/10.00 CP the Raindrops from the kit. Resize 25% and move under the flower circle. CP the Pearl Dragonfly 1. Resize 35% then 50%. Sharpen and DS 2/2/45/5.00 Position to your liking. CP the Spiral Heart. I erased the spring part of it. Resize 20% and sharpen. Position between your 2 Celtic Bars. Duplicate and move one to the opposite side. DS the same.

Hide your white background, template layer, and scenery layer. Merge visible. Unhide all.

CP Paper 12 and resize by 65%, sharpen. Apply Mask 179. (Layers>New Mask from layer>invert data NOT checked). Now before you merge group, resize by 90%. Merge Group and sharpen. Center it behind your template layer. Still on your mask layer, erase any of the mask that you can see in the celtic symbols on the bars.

Merge your template layer, mask layer and wht background together. Open my word template and paste onto the canvas. Position where you want it and DS the same. Add your name and any ©. If you are not animating it, then you are done and can save as a jpg.

ANIMATION

Open Animation Shop.

In PSP, merge down your Scenery Layer to the background. Hide your top tag layer and Edit>Copy Merged. Paste as a new animation in AS. Duplicate this twice to give you a total of 3 screens. There is a little duplicate icon button on the task bar for those new at AS.

Open the rain template I supplied. CTRL AC on that template. Select your tag background and CTRL AE. Now center your rain on the scenery BEFORE you click on your mouse.

Back in PSP.... Hide your background layer and unhide your tag layer. Edit>Copy Merged. Paste AS A NEW ANIMATION in AS. Duplicate this twice to make 3 screens. Then CTRL AC. Click back on your background with the rain you just made and CTRL AE. Position the tag layer onto the background, centering the circle BEFORE you click on your mouse.

Save as a gif. You are done. Hugs, Lana

Sunday, March 29, 2009

Light The Way (PTU) Tut

Light The Way Tag Tut

This wonderful kit is by Dee at http://dees-deelights.com/store called FaerieLand V. Dee is graciously giving everyone 30% off the kit with the following coupon code. Use the code DSLANASBLOG30 and it is good until April 3, 2009. Thank you so much Dee! The tube I used is also part of the kit.

Here is the mask I used. Just right click and save to your computer somewhere.

Open a new canvas 500 x 500 white background.

CP a frame of your choice. Resize by 75%, sharpen. With your magic Wand tool, click inside the frame square. Don't forget the little loops in the bottom left corner. Select>Modify>Expand by 3. CP the background onto your canvas and resize by 50%. Move into box area and when you have it positioned to your liking, sharpen. Select>invert>delete. Select none.

With you magic wand, select inside the leaves on the frame. Make sure to get all the little areas. Selections>Modify>expand by 3. Paste another paper of choice and position on the leaves. Selections>Invert>Delete. Select none.

Magic wand inside the bow loop. Expand by 3 again. Paste another paper of choice. I resized mine 50% and sharpened. Invert and delete. Select none. Now drop shadow the frame 2/2/45/8.00

Move your 3 paper layers down under your frame. Hide your white background and merge visible. Unhide white background.

CP a doodle of choice onto your canvas. Resize 50% and sharpen. Move to the top right corner of your frame. Then with your eraser tool, erase the stem part of the doodle so that the top curl is hanging over the frame corner. DS the same.

CP a tube of your choice and resize, sharpen if needed. I used the faerie in the kit. DS 2/2/45/8.00 TWICE.

CP flowers from the kit. Resize 25% then 70%. Sharpen and place to your liking. DS 2/2/45/8.00

CP Foilage 1. Resize 40%. Image>Free rotate>Right 30% and sharpen. DS Same and move below your flowers. CP Foilage 2 and do the same but rotate it to the LEFT 30%. DS and move below your flowers.

Open 2 Butterflies of your choice. Copy one of them and then paste it onto the second butterfly. Resize by 90% and sharpen. Merge together. Copy and paste your new butterfly onto the working canvas. Image>Resize by 40%. Image>Free Rotate>right 30%. Sharpen and DS same. Move to your liking. Duplicate and mirror. Move the second one to your liking.

Hide your white background and merge visible. Unhide.

CP a paper of your choice and move below your tag layer. Resize by 75% and sharpen. Open your mask I provided and Layers>New Mask Layer>From Image with invert checked. Apply. Merge group. Now with your pick/deform tool, make the mask just slightly larger than the tag all the way around so you can just see the edges. Reposition the tag if needed. Layers>Merge Visible.

Image>Resize 400 x 400 pixels, all layers checked. Sharpen. Effects>Xero Porcelain with these settings: Softness 25, strength 128, brightness 129,Red 112, green 0, blue 255. ok.

Add your name and ©. Save as jpg if not animating. You are done.

ANIMATION

Open Animation Shop. In PSP, choose your lighten/darken tool (next to your eraser in the drop down menu). Standard settings. Click 3 times on something in the background you want to glow. Just one thing though. Edit>Copy. Paste it in animation shop as a new animation.

Back in PSP, CTRL Z 3 times to remove what you just did. If you go back to far, just go to edit> repeat layer.... Now, with your tool again click 3 times on something else you want animated in the background. Edit>Copy. In AS, paste after current selection.

Back in PSP, CTRL Z 3 times again. Now, click 3 times on the lantern the fairy is holding. Feel free to move your clicks around alittle on the lanters instead of in one spot. This will make it look more natural. Edit>Copy. Back in AS, paste after current selection.

Check your animation by clicking on the little movie icon in the task bar. All ok? Save as a gif and you are done.

Hugs, Lana

Wednesday, March 25, 2009

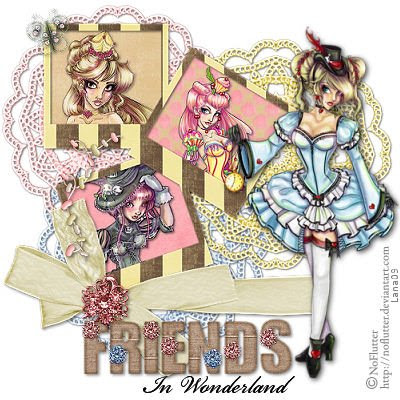
Friend's In Wonderland Tut (PTU)

This tag was made with the wonderful kit by Dee at: http://dees-deelights.com/store called PinkMallow. Don't forget to pick up the freebie off her blog as well called JellyBean strings!

I used fantastic tubes by No Flutter at http://noflutter.deviantart.com/

New Canvas 500 x 500 White Background. CP Frame 3 from the kit and resize 70%, sharpen. With your magic Wand, select inside one of the frames. Selections>modify>expand by 3.

CP a tube of your choice and position on the square. Selections>invert>Delete. DO NOT DESELECT! Copy and paste a paper of choice, postion on the square and delete. Select none. Do the same with the remaining 2 frame centers. Once done, DS your tubes and the frame 2/2/45/5.00 black. Hide your white background and merge visible.

CP your main tube and position. Resize if needed and sharpen. DS 2/2/75/10.00 black.

CP all 3 Doilies onto your canvas. Resize by 75% then 60% and position one behind each frame, overlapping. DS each 2/2/45/3.00 black.

CP Butterfly 1 and resize 15%. Sharpen twice and DS 2/2/45/5.00. Position it onto the top corner frame or to your liking.

CP one of the Jelly Bean strands from the freebie. Resize 25%, sharpen and DS the same. Position on the bottom frame to your liking.

CP one of the Ribbons and resize it by 50%. Image>Flip. Place it at the bottom of your frames and to the right so that it touches the side of the bottom frame. Move below your Jelly Beans in the pallets layer. Now with your PICK tool, pull the end of the bow out so that it hides behind your main tube. DS the same. Hide your white background and merge visible.

If you haven't save a temp copy of your tag as yet, do so now!

Open a new canvas 600 x 600 TRANSPARENT background. Open your alpha from the kit and with your lasso tool, copy and paste whatever letters you want onto your blank canvas. I did "Friends". Once finished, hide raster layer 1 and merge visible the letters together. Now CP this new word onto your tag. Resize to your liking, sharpen and DS the same. Move into position where you want it. Merge visible.

Add your name, © and save as a jpeg. You are done! Yep, a rather quick and easy one today.

Hugs, Lana

Tuesday, March 24, 2009

Springy Tag Tutorial (PTU)

I used the very springy kit of Dee's from Dees Delights called Across The Valley. You can purchase it here: http://dees-deelights.com/store

The Tube I used of Rion Vernon's http://www.pinuptoons.com/ . Can be purchased at http://www.cilm.com/.

Here is the background template I created. Just right click and save to your computer. It is in PNG format....

Open a new canvas 600 x 600 white. CP the frame and resize 75%. Ctrl A F and defloat. CP paper 15 from the kit. Resize by 75%. Select>Invert>Delete. Select none and delete your frame template layer now. You no longer need it. Hide your white background.

With your magic wand, select inside both frame layers while holding down your shift key. This allows you to select them both at the same time. Select>Modify>expand by 4. CP DL ART from the kit and move to your liking. Resize by 75%. Selections>Invert>Delete. DS your frame 2/2/45/5.00 then -1/-1/45/5.00 Unhide your white background.

CP bars template that you saved and CTRL A F and defloat. CP Paper 2 from the kit. Select>invert>Delete. DO NOT DESELECT! Duplicate this layer 2 more times to give you a total of 3 bar layers. Delete the bar template.

Open your kite from the free addon kit and resize it 35-40% then by 80%, sharpen. Effects>Muria Meister Copies with these settings: Number 4, Shift 55. Duplicate in the bottom dropdown menu and Random in the top left drop down. All other's stay the same. Click ok. Edit> Copy. Choose your bottom bar layer on your working canvas and paste the kite as a new layer. Hit Delete. Merge Down 1.

Go back to your kite and CTRL Z to remove your MM Copy you just did. Apply MM Copies again but change the Shift X to 30. ok. Edit>Copy. Go back to your working canvas and choose the middle bar layer. Paste as a new layer. Delete. Merge down 1. Go back to your kite copies and CTRL Z again. Reapply MM Copies one more time with the Shift X setting at 28. Ok. Copy. Back on your working canvas, select your top bar layer and paste as a new layer. Delete and merge down 1. NOW you can select none. DS each bar layer 2/2/45/5.00. Move your frame and scenery layer up in the pallets above these bar layers.

CP a tube of your choice. Resize if needed and sharpen. DS 2/2/45/8.00/ twice. Apply any of the other elements in the kit that you wish. Have fun with combining things! DS any you add 2/2/45/5.00

Hide your white background and ALL 3 bar layers. Merge Visible. Unhide your hidden layers. If you want to add a light background behind the bars, do it now. I used PAper 14 and just a standard mask. It looks fine without it though so it is your choice. Merge it to the white background if you do.

Image>Resize>all layers checked>400 x 400 pixels. Sharpen each layer. Add your name and ©.

At this point you should only have 5 layers; tag/tube layer, 3 bar layers, and your white background. Hide your middle and top bar layer. Edit>Copy MERGED.

Open Animation Shop and paste as a new animation. Back in PSP; hide your bottom bar layer and unhide your MIDDLE bar layer. Edit>Copy MERGED. Back in AS, paste after current selection.

Back in PSP. Hide your middle bar layer and unhide your top bar layer. In AS, paste after current selection. Now CTRL A on your keyboard. This selects all 3 layers at once. Animation in your tool bar>Frame Properties and change the speed to 35. Save as a gif.

Hugs, Lana

Some new tags I have made......

I did the above one for Diabetes Awareness.
The Above tag was made for Autism Awareness.

Friday, March 20, 2009

Forest Sprite Tut (PTU)

This tut was created with the kit called All I need by Dee's Delights @ http://dees-deelights.com/store

My additional supplies can be downloaded here: http://www.4shared.com/file/94058278/f5b0d049/Forest_Sprite_Tut_supplies.html

Create a new canvas 600 x 600 White background.

CP frame 1 and resize by 70%. Sharpen.

Magic wand inside frame opening and select>modify>expand by 4. CP Paper of choice, invert, delete. Move this paper layer below your frame. DO NOT DESELECT! Invert again. Paste a tube of your choice and center in the frame. If you want to color the tube go to ADJ>Hue/Saturation>Colorize>with hue 0 and Saturation 73. Invert, Delete. Select none. DS your frame layer 2/2/45/7.00 Hide your white background and merge visible. Unhide.

Open Brad 2. CP as a new layer and resize 40%. Sharpen. Position it beside the frame. Duplicate and line it up underneath. Duplicate again and line it up. Merge these 3 brads together. Duplicate once again and Image>Mirror. Image>Flip. Adjust them if you need to. Merge these 2 sets of brads together and DS the same. Merge down to the frame layer.

Open, CP doodle 4. Resize by 65% and move it under your frame layer to the bottom. Duplicate and Image> Mirror. Image>Flip. Position at the top of the frame. Merge the 2doodles together and sharpen. DS the same. Merge the frame layer down to the doodles.

Open 2 contrasting flowers of choice. Copy your darker flower and paste it onto your lighter flower. Image>Free Rotate 20% left. Merge down to the lighter colored flower. CP it now as a new layer onto your canvas. U can close out the original flowers now but don't save them when it asks! With your flower layer selected, resize 20% and sharpen. DS the same. Move to your bottom left corner. Layers>Duplicate and move to your top right corner.

Copy some vines or use the ones I supplied. Resize to liking, DS the same. Move under the flowers you just made. Merge the flowers and vines together only. Do not merge them to the frame if you are going to animate!

CP Paper 6 onto the canvas and move it under your frame layer. Resize 85% and sharpen. Open Mask 0721 AMLRMask in my supplies. With paper layer selected, Layers>New Mask Layer from Image and select the mask. Invert box checked. Ok. Merge Group. Image>Resize 110%. Reposition your frame layer and flowers if needed centering. Hide your Flower/Vine layer and merge visible.

Image>Resize 75%, all layers checked. Unhide your Flower/Vine Layer. Add your name and copywrite. If you are not animating it, you can save as a jpg and you are done, yippie!

ANIMATION:

You should have 2 layers: tag layer and flower/vine layer. Select your vine layer. Open up Animation shop. On your Vine layer: Effects>Xenofex2 Constellation> with these settings:

Star Size = 2.42 Size Variation = 1 Edge Density = 1 Overall star density = 0 Overdrive = 73 Twinkle Amount = 62 Rotation = 45 Keep Original checked. Ok.

Edit> copy MERGED In Animation shop: Paste as a new animation Back in PSP: Ctrl Z on your keyboard. Apply your Constellation again but hit the random seed button once. All others stay the same. Ok. Edit> Copy MERGED In Animation Shop: Edit>Paste after Selectioned frame. Back in PSP: Ctrl Z again and repeat the Constellation hitting the random seed again. Copy Merged. Apply it in Animation Shop once again.

Once you have all the screens you want to make with a minimum of 3, In Animation Shop: Ctrl A on your keyboard (this selects all the new screens at the same time) Then go to Animation>Frame Properties> and change the speed to 20. Save as a Gif and you are done!

Hugs, Lana

Easter Hatchling Tut (PTU)

This wonderful kit is called Country Rose and can be purchased from Dee's Deelights @ http://dees-deelights.com/store

My Additional supplies and mask here: http://www.4shared.com/file/94053601/1325d1f7/Easter_Hatchling_Supplies.html

New Canvas 600 x 600 White Background.

CP Frame 2, Resize by 70%. Sharpen. CP Paper 2, Resize 70%, move below frame layer. CP Paper 7, Resize 70% and move ontop of the last paper but below the frame. Double click on this raster layer and change the opacity to 75%. Ok. Merge both paper layers together.

With your magic Wand tool, select inside the frame opening. Selections, Modify, expand by 3. Selections, invert and click on your paper layer in the palets. Delete. DS (drop Shadow) your frame 2/2/45/7.00

CP a tube of your choice. Resize it to your liking and sharpen. I resized mine 70%. Position at the frame bottom. Sharpen if you resized. Duplicate your tube layer and move one of these below your frame layer but on top of the paper. On your TOP tube layer, lasso and delete any of the eggshell that is over the frame. You don't have to be neat about it so go above the frame edge. Now click on your lower tube layer and do the same to anything BELOW the frame. DS your BOTTOM tube layer 2/2/45/9.00

On your paper layer, add any brushes or accents that you choose. I added Flower 4 from the kit, resized 50% and sharpened. Again, with your lasso tool, delete any of the flower that sticks out below or around the outside of your frame.

Hide your white background and merge visible. Unhide background.

CP another paper of your choice and resize 85%. Open mask 128 By NB in my supplies. Layers, new mask layer from image with the invert box checked. Ok. Merge group. Still on your new mask layer, with your pick tool, resize the mask just slightly larger than your frame. Reposition your frame layer if needed.

Open Rose Flowers 1,2,3. Resize each by 40% and then by 60% and sharpen. CP them onto your working canvas. Resize the rose colored flower another 60% and position on the bow, sharpen again. Position the remaining 2 flowers on the ribbon. Merge these down to your frame layer.

Open Rose Flowers 5 and 7. CP both flowers onto your canvas with the lighter colored one being underneath. Resize the top flower 40% then 50% and sharpen. Resize the lower flower 40% then 60% and sharpen. DS each flower separately 2/2/45/7.00 and Merge these 2 together. Position in the bottom corner of your frame. Merge down to the frame layer.

Open your bows from the kit. With the lasso tool, select the one you want by drawing a line around it then Edit, copy. Paste it onto your working canvas and resize by 20%. Sharpen and DS same as before. Move to the top corner of your frame. DO NOT MERGE YET!

CP the tag in my supplies and resize to your liking (90%). Image>Free Rotate> Left 10. Position it under the bow and DS. Sharpen if needed. Now merge your bow down to the tag. Merge down to your frame layer. DS your whole tag layer once again with the same settings. (2/2/45/7.00)

Lastly, select your mask layer. Effects>Xenofex 2 Constellation> with the standard settings and keep original image box selected. OK. Hide your white background and Merge visible. Unhide it and recenter your tag layer if needed. Merge visible.

Resize 75%, all layers checked. Sharpen if needed. Add your name and copywrites. Save as a jpg.

Hugs, Lana

Tuesday, March 10, 2009

One Way Tag Tutorial

This tut was created with the wonderful kit "SPEED" by Seashell at: http://seachellscrapz.blogspot.com/

My additional supplies including the animated tire that I animated can be downloaded here: http://www.4shared.com/file/92154162/ec62ef68/One_Way_Tut_supplies.html

I am using the wonderful are of Ismael Rac at http://www.eracx.com/ and can be purchased through MPT (My psp tubes).

You will also need Xenofex 2 - Rip out and Xenofex Fritillary plug ins.

On to the tut....

Open a new canvas in PSP 600 x 600 white bkg. CP frame # 39 and resize 40%. Move it up to your top right hand corner. Sharpen and magic wand the center of the frame. Selections.Modify>expand by 2.

CP pare 11, rsize 40% and move over to the frame center. Sharpen. Invert and delete. Do NOT deselect! Invert again and move the paper layer below the frame layer.

Open Alien Skin Xenofex 2 Rip Open. Set your setting to: Curl size 73, Amount 27, Variation 80, Roughness 17, Shadow 7.87, fill with white and random seed at 2886. ok. Select none. Magic wand the white filling and Modify>expand by 1. Delete. Select none. Hide this layer ripped out layer and magic wand the center of your frame again. Modify>expand by 2.

Layers>New Raster Layer. CP a speed limit sign INTO selection. Select none. Move below your frame layer and ripped out layer. Now, magic wand the speed numbers on the sign. CP a road of your choice. Resize by 40% x 2 and move over to your speed limit sign and position where you want it. Hit delete to remove the road that is hanging over the #'s.

Hide your wht bkg. Unhide ripped out layer. Now erase any parts of the frame that overlap your white ripped out edges. This way your tears look like they are coming out of the frame. Merge Visible. Unhide wht bkg. and DS your new picture 2/2/45/6.00. Resize 75% and sharpen.

Open a car of choice. I mirrored mine so it was going the opposite direction. CP and resize 75%. Image>Free Rotate> Left 5%. Move it to the bottom of your speed sign and DS the same.

CP your main tube. Resize if needed, sharpen and DS 2/2/75/10.00

CP Speed #32. Resize by 75% x 2 and sharpen. Drag this below your car layer and position in middle of the car. DS 2/2/45/5.00

CP Wrench. Resize by 40% then 50%. Sharpen and position to your liking. DS Same.

CP Speed #7, Resize 40%, sharpen and DS Same.

CP Speed #9, Resize 40%, sharpen and DS Same. Position under the flags.

CP Speed #10, Resize 40% x 2, sharpen, DS and position over the flags. Magic wand the white areas of this sign. Layer>New Raster Layer. Flood fill it with white. Deselect and move below the little sign. DS the same and merge to the sign.

CP Speed #11, Resize 40%, Sharpen and position. DS the same.

Do not do this next step if you want to have animated tires!!!!! CP Speed #20 tire and resize to your liking. Move to the end of your road and DS same.

Hide your Wht. Bkg and merge visible.

CP Paper 10. Move below your merged layer. Resize by 72%, sharpen and apply the Beck Mask 23. Layers>New Mask Layer from image>Becky Mask 23. Merge group and dulplicate 2 times. Merge those mask layers together.

CP Paper 4. Apply the mask again. Merge Group. Hide your wht bkg layer and mask layer. Merge visible.

Resize>all layers checked>to 450 x 450 or to your liking. Sharpen. Add your name and copywrite info onto the tag. If you are not animating then you are done and can save as a jpg.

ANIMATION:

U should have 3 layers at this time. Your tag layer, mask layer and wht. bkg. layer. Highlight your mask layer. Unhide any hidden layers.

Effects>Xero Fritillary> with these settings: Granuarity 5, Aggression 44, Tesselation 10 and Variation 33. ok. Edit>COPY MERGED

Open Animation Shop and paste as a new animation.

Go back to PSP and CTRL Z to remove your last Fritillary. Apply the Fritillary again with the Variation at 35. ok. COPY MERGED. Go back to animation shop and paste AFTER SELECTED animation.

Go back to PSP and CTRL Z. Apply the Fritillary 3 more times moving the Variation to 37, 39, 41 each time. Remeber that you are going to COPY MERGED each time and paste it into AS.

This complete, you should have 5 screens of your tag in animation shop. Correct? hehehe. Still in AS, open your animated tire I made from the kit and Ctrl A C then on the tag Ctrl AE to paste the tire into all 5 screens at the same time.Right mouse click when you have it where you want it. Ctrl AE again if you want to add another tire. Check your animation and save as a gif.

Hope you liked this tut. Hugs, Lana

Saturday, March 7, 2009

Wanna Get Lucky? Tut

This tut was created with the wonderful kit from Dee's Deelights at http://dees-deelights.com/store Called Mintie. Thank you for creating such a great kit!

The tube I used is from Keith Garvey at http://www.garvgraphx.com/ and can be purchased through MPT. Please do not use without a license.

All my other supplies and the animated flower/words I made myself and can be downloaded here: http://www.4shared.com/file/91649196/8f70ecf6/Wanna_Get_Lucky_Supplies.html

On to the tut.....

Create a new canvas 600 x 600 wht.

Open the tmeplate #63 by Ali and hide the copywrite layer. Merge down the shape 2 layer and doodle. CP this new template onto your working canvas. Image-Resize-85%. Select all-Float-Defloat.

CP paper 7 from the kit. Selection-Invert-Delete. Select none. DS this layer 2/2/45/5.00 Go ahead and delete your template later as you won't be needing it again.

Back on your #63 template, copy the template that is labeled Shape 1. Paste as a new layer onto your working canvas. You can close out your Ali Template 63 now. On your working canvas, Select all-Float-Defloat that new shape. CP paper 10, resize by 75% and Adj-Sharpen. Invert-Delete-Select none. Delete your template layer once again and resize this new layer 90%. Float and Defloat this layer again.

Layer-New Raster Layer. Click on your materials palet and change the top box to any gold gradient under your gradients tab. I used JER Gold with no repeats. Fill your new layer with the gold. Select-Modify-Contract by 9 and delete. Deselect. Image-Resize 101%. DS 1/1/45/3.00 then -1/-1/45/3.00

CP your tube. Resize if needed and sharpen. Position to your liking but off to the right. CP a ribbon of your choice and move it below the frame layer in your palets. Duplicate it and move this duplicate above your frame. Select your top template layer you made and Float then defloat it. Selections-Modify-contract2. Invert. Now select the ribbon layer that is below your frame and hit delete. You won't see anything happen because of the top ribbon. Deselect. Now, go to your top ribbon layer and erase the ends of the ribbon well into the frame background. Select your bottom ribbon layer again and DS 2/2/45/5.00

Open Flowers1. with your freehand lasso tool, draw around the bunched flowers. Copy. Paste onto your working canvas. Move it down below your frame and top template layer. DS the same.

CP the word template I made onto the middle of the frame. Position to your liking. CP another paper of your choice and brag it down to just above the white background. Apply your mask Becky 23 (Layers-new mask layer from image-Becky23-ok). Merge Group.

Select your very first template layer ( the one with the doodles) and DS the same. Highlight your top layer in Palets. Open Butterflies of choice, resize 35% then 50%. Sharpen and CP onto your working canvas. DS the same. CP your dragonfly and do the same to it. Position.

On your tube layer, DS 2/2/65/10.00 Hide your wht background and mask layer. Merge visible. Unhide and center your tag on the mask layer. Merge Visible all layers. Resize all layers checked, 450 x 450 Pixels. Sharpen and add your copywrites and name.

If you are not animating then you are done and can save as a jpg.

ANIMATION:

Edit-Copy. Open up Animation shop and paste as a new animation. Duplicate your tag to 3 layers by hitting the little duplicate icon in the task bar twice.

Open up the animated flower I made and CRTL AC and click on your tag animation- CTRL AE. Position the flower where you want it and hit your left mouse button. You can always hit CTRL Z to remove it and do it again. Check your animation by hitting the little movie icon in the task bar.

Save as a gif. You are done!

Hope you liked this one, Lana.

Thursday, March 5, 2009

Lucky In Love Tag Tut

This tut was created with an awesome new kit by Dee at http://dees-deelights.com/store called Luck Of The Irish.

The tube I used is by Tom Hoover at http://www.tomhooverart.com/ and MPT. Please do not use without a valid license.

All My additional Supplies can be downloaded here: http://www.4shared.com/file/91313535/1c0f03bd/Lucky_In_Love_Tut_Supplies.html

The Mask I used is a wonderful Sabre creation Love Of Eon and is included in my supplies but please visit him here to get all his gorgeous freebies! http://sabresquillandparchment.blogspot.com/

Alrighty, we are off......

Create a new canvas 600 x 600 Wht. Background (BKGD).

Copy and Paste (CP) the circle template out of my supplies. Select all>Float>defloat.CP the green Irish pattern onto the canvas BUT DON'T MOVE IT! Effects>Mura Meister Copies with these settings: Random=Tile, At the bottom drop down select Wallpaper. Everything else stays the same. Ok. Now your circle template should be covered with the Irish Green Pattern.Selections>Modify>Contract by 20 and delete. You can delete your circle template layer now.

Magic wand the center of the circle. Select>Modify>Expand 4. CP a paper of choice, I used #8. Resize 60% and sharpen. Select>Invert and delete. Move this below your frame layer. Select your frame layer again in the palets and Efects>3d effects>inner bevel> Bevel shape #2, Width 3, smooth 10, depth 2, Ambience 0, Shininess 1, Angel 354, Intensity 45, Elevation 30, white color, ok. Drop Shadow (DS) 2/2/45/5.00 Black. Hide all layers now but the white bkgd.

CP your little clover template from my supplies. Isn't it cute? I made it too....lol. Float and Defloat. Layers>New Raster Layer> ok. Click on your top materials color square and change it to a gold gradient of choice in your gradients tab. Repeats 0 and angle at 323. With your fill tool, fill the top layer you just made with the gold. Select none and delete the clover template. Effects>3d effects>Inner Bevel the same as before but change your width to 1 and your depth to 1. Resize 75% and sharpen. Duplicate and hide it so that you have 2 clover frames but can only see 1.

With your magic wand tool, click inside the clover center. Selections>Modify>Expand 2. CP another contrasting paper from the kit. Resize 50%, invert and delete. Invert again. Duplicate this little clover background and hide it. You should still see one clover frame and one clover bkgd. CP your tube of choice and move over to the clover. Center whatever you want showing within the little marching ants. Invert and delete. Select none.

Now, go to your raster layer palet and double click on this tube layer. Change the opacity to 75% and the blend mode to Illuminance. Move both your tube layer and the clover bkgd layer below the clover frame. Hide your wht bkgd and merge visible. Hide this finished clover frame. Unhide your white bkgd and your other 2 clover frame pieces. Select the clover bkgd and float, defloat. repeat the process of adding the tube again just as you did. When you are done, hide the white bkgd and merge visible.

Unhide all your layers. DS both small clovers the same as before. Position them to your liking on the circle frame. Now, repaste your main tube, resize if needed, sharpen. DS 2/2/55/10.00

Open a charm of your choice, resize by 50% and sharpen. Position to your liking and DS 2/2/45/5.00 CP a bow that you like, resize, sharpen and DS the same. CP a horseshoe of choice, resize 50% and sharpen. Position behind your tube and to the bottom. I erased some of it that i didn't want showing as I really only wanted the clover and flowers. Duplicate, mirror and move to the top right of your tube. DS both horseshoes that same as before. CP the Pot of Gold. Resize 65% and sharpen. DS the same and move into position. Hide your white bkgd layer and circle bkgrd layer. Merge Visible. Unhide all.

CP another paper of choice. Move it below your tag and cicle bkgrd layer. Open your SL New Eon Sabre Mask. Click back on your tag canvas and Layers>New Mask Layer from Image>Select the mask and ok. Merge Group. Layers>Resize 110% and sharpen.

Resize>all Layers checked> 450 x 450 and the sharpen each layer. You should now have 4 layers: Frame/tag Layer, Circle Background, Mask, and wht bkgd. Add your name and copywrites then merge down to your top tag layer. Hide your top tag layer and merge visible all the rest. Copy MERGED.

Open Animation Shop. In AS, paste as a new animation (Edit>Paste>As a new animation). Hit your little duplicate icon two times to give you 3 screens. Open your animated clover from my supplies. CTRL A C on the clover. Click on your background layer and CTRL A E. Position the clover on the green background circle where you think it should be and click your left move button.

Go back to PSP. Hide your background layer and unhide your tag frame layer. Copy MERGED.

Go back to AS and paste as a NEW ANIMATION once again. Make two more by hitting your duplicate icon twice. CTRL A C. Click on your background/clover layer and CTRL A E. Center your frame onto the circle background. Click your mouse. You can check your animation by clicking on the little movie icon in the top tool bar.

Save as a gif and you are done! Hope you liked this tut.

Hugs, Lana

Monday, March 2, 2009

Innocence Remebered Tag Tut

Photobucket

Innocence Remebered

This tut was made with the great kit from Mystee at: http://mysteikllesinfulkreationz.ecrater.com/index.php called Moments In Love.

The wonderful art I used is by Zindy at: http://zindy-zone.dk/ Please don't use her art without a valid license.

Onward to the tut.......

600 x 600 Wht bkgrnd

Open a matt of your choice and resize 50% x 3. C/P as a new layer and sharpen. With your rectangle selection tool, draw over the little inside square dots. C/P a tube of your choice. Invert>delete, select none. In your layers palet, double click on that layer. Change the layer properties to Screen and 80% opacity or your choice. Merge down and DS 2/2/45/5.00.

Open Element 15 heart. Resize to 20% x 2, sharpen. CP onto canvas and DS the same. Move this to the top right corner of your canvas.

CP Element 19, resize 20% and sharpen. Move to bottom right corner and DS the same.

CP Element 10 Ribbon. Resize 20% then 75%. Sharpen. Image>flip. CP your main tube of choice. Resize if needed and sharpen. Move it so that it is slightly to the side of your frame. DS 2/2/65/10.00 Move the ribbon down to the bottom of your main tube and then make sure it is ABOVE your tube in the layers palet. If not, drag it up one.

Select your text tool and a bold font. I used Arno Pro Smbd Caption at 72 pixel size. Type out any word you choose to. Hit ok. DO NOT RASTERIZE YET! You can stretch out and manipulize the word to the size or height you want it by moving the little square boxes aroung the type. When you are satisfied, rasterize your text layer. Layers>Rasterize. Float and defloat the text (CTRL A, CTRL F and then selections>Defloat) Open a paper of your choice, resize by 50%. CP onto the canvas and move it over to your typed letters. Invert>Delete. Deselect and now you can delete your typed text layer.

Select your text layer if it is not already. Effects>EyeCandy4000>Gradient Glow>Under the colors tab type in the color #a3adc5 with opacity at 100. Under the Basics Tab = Glow width 3, Soft corners 25, Overall Opacity 100, Draw only outside box checked. Ok. DS 2/2/45/5.00 Move your word down 1 layer, below your ribbon. Position to your liking.

Open your flowers 12 & 13. CP Flower 13 ONTO your flower 12. Merge the two flowers together, resize by 50% x 4, sharpen. CP this new flower onto your canvas, DS the same and move it to one side of your ribbon.

Hide your Wht Bkgrnd and Merge Visible. Unhide your bottom layer.

Open a paper of your choice. I used paper 15. CP as a new layer. Open your mask supplied and Layers>New mask layer from image>Mask 04 and INVERT BOX CHECKED. Ok. Merge group. I duplicated my mask layer 4 times and merged them together. To make it brighter: ADJ>Brightness/Contrast> bright -30, contrast 20.

Open a butterfly of your choice. CP and resize 15% then 50%, sharpen. Image>Free Rotate> left 30%. Position to your liking and sharpen again. DS the same. Merge down to tag layer.

You should now have 3 layers in your palets. Tag Layer, Mask Layer, and wht bottom. Resize all layers checked 400 x 400 (or your preference). Sharpen each layer. Add your name and copywrite, merge down to tag layer. If you are not animating the tag, you are done and can save as a jpg.

ANIMATION:

Hide your wht background and your tag layer in palets only. Highlight your mask layer. Edit> Copy MERGED.

Open Animation Shop and paste as a new animation. Hit the "Duplicate" icon button in the top bar until you have 5 screens. Effects>APPLY IMAGE EFFECTS> Check mark the elapsed time box. Effect is UNDERWATER. Show preview box is also checked. Click on your "Customize" button and select "Apply Sunlight Dappling". Sunlight Intensity 10, water depth 15, and play with your little layer directional lines/buttons until you have a somewhat of a star pattern of the lines with dots at the ends. I can't give you exacts as I want you to just play around and see what you like. Click ok. Click on screen #1 and delete it. Now you have 4 screens. Leave that now and go back to PSP.

In PSP, hide your mask layer and unhide your wht background. COPY MERGED and go back to Animation Shop. Paste as a NEW ANIMATION. Hit your duplicate button again until you have 5 screens. Select and Delete one of them so you have 4 screens. Now, on the animated mask layer we just made in AS... Hit your keyboard buttons CTRL A C to copy all screens at the same time. Click on your wht background screen and CTRL E on your keyboard. Move your mask around to center it on the white background and click your left mouse button. You should now have all 4 layers with white and mask layer together.

Back in PSP. Hide your wht background and unhide your tag layer. COPY MERGED. and back to Animation Shop. Paste as a new animation once again and duplicate it to 5 screens. Select 1 screen and delete. You now have 4 tag screens. CTRL A C and select your background that we just left. CTRL E and position your tag layer onto the background then click your mouse. To check your animation, hit the little movie icon on the task bar. All's well? Save as a Gif and you are done.

Hope you like this tut.

Hugs, Lana